 how-to
Attic Insulation ROI: How to Calculate Your Payback
Quick Summary
Attic insulation ROI is the ratio of the energy savings an upgrade produces to its net cost. To calculate it, divide your net cost by your estimated annual savings to get the simple payback period in years. Gather your attic area, current and target R-value, and past utility bills first.
- Measure attic floor area and current insulation depth before requesting quotes.
- Net cost equals total installed cost minus verified incentives, so confirm rebates first.
- Run low, typical, and high savings cases instead of relying on one estimate.
- The attic share of heating and cooling spend and the expected reduction drive results most.
- Seal air leaks and check ductwork, since they can undo much of the insulation benefit.
Table of Contents
- What Attic Insulation ROI Measures and Why It Matters
- Gather the Inputs: Attic Area, Current and Target R-Value
- Attic Insulation Cost per Square Foot and Total Upgrade Cost
- Step-by-Step Attic Insulation Savings Calculation
- Adjusting the Math for Climate, Energy Prices and Incentives
- Common Mistakes That Distort Your Insulation ROI
- Requesting a Free Estimate to Verify Your Numbers
- Frequently Asked Questions
What Attic Insulation ROI Measures and Why It Matters
Last Updated: November 5, 2026
Attic insulation ROI tells you how much money an upgrade returns over time, compared with what you paid for it.
Attic insulation ROI is the ratio of the energy savings an upgrade produces to the net cost of doing it.
The math is simple. The inputs are where people go wrong. Here's what matters most:
- Your starting point: how much insulation is already in the attic
- Your target: the R-value you plan to reach
- Your costs: materials and labor, plus any removal work
- Your savings: the drop in heating and cooling use
Most of the savings come from cooling. Attics in hot climates can reach extreme temperatures, and heat pushes down into the living space. Better insulation slows that flow, so your AC runs less often.
A common mistake is treating every dollar of savings as guaranteed. Energy prices change, and your savings depend on how your home actually performs.
Gather the Inputs: Attic Area, Current and Target R-Value
Before you calculate anything, collect five numbers. You can get most of them in about 30 minutes.
- Attic floor area in square feet. Measure length and width of the floor you'd insulate, then multiply.
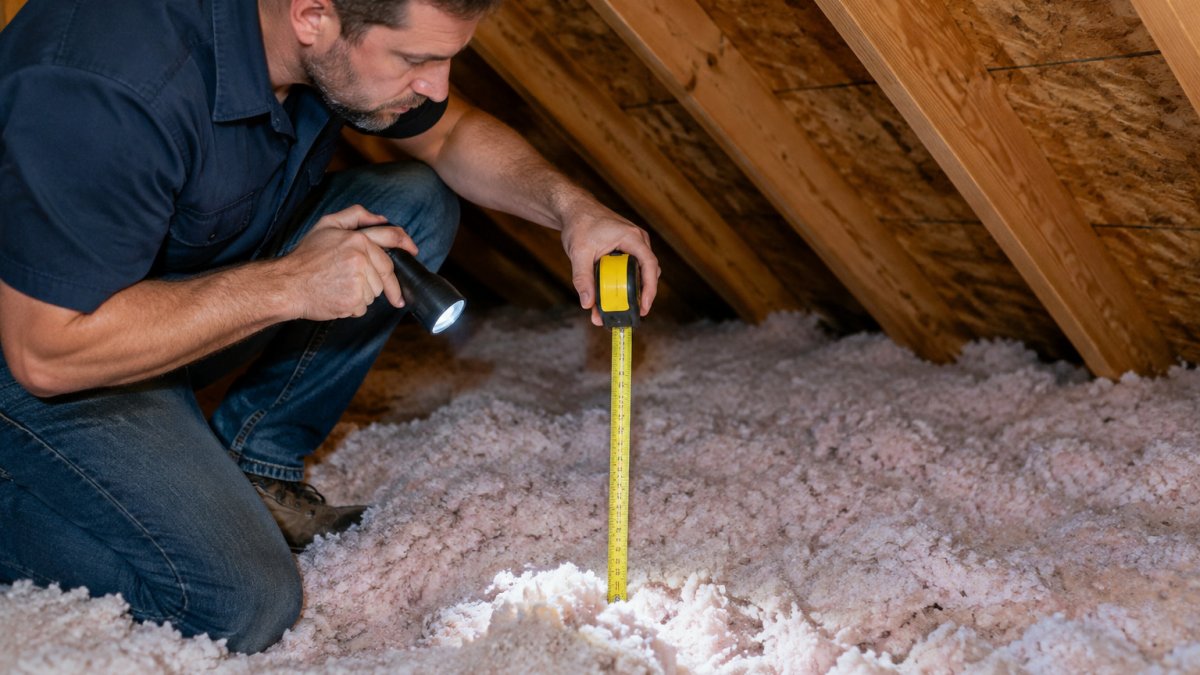
- Current R-value. Check the insulation depth with a ruler. Check the insulation depth with a ruler and confirm the material type before estimating its R-value.
- Target R-value. Ask your contractor which target R-value fits your home and climate.
- Insulation type. Fiberglass batts, blown cellulose, and spray foam perform differently.
- Your annual cooling and heating costs. Pull these from the last 12 months of utility bills.
Watch out: Don't measure only the open floor. Check for recessed lights, ductwork, and access hatches, since these affect both area and cost.
Attic Insulation Cost per Square Foot and Total Upgrade Cost
Upgrade cost depends on the material, how much you add, and whether old insulation must come out first. Quotes depend on home size, material, and contractor, so use your own written estimates for the final math.
To find the total, use this formula:
Total cost = attic area × cost per square foot + removal and prep costs
The example below shows how the formula works; substitute your own quoted figures.
Ask every bidder for the same details:
- Price per square foot
- Whether old insulation removal is included
- Air sealing and ventilation work
- Warranty terms
A common mistake is comparing a quote that includes air sealing with one that doesn't. The cheaper bid may simply cover less work.
Step-by-Step Attic Insulation Savings Calculation
Most guides tell you to multiply savings by a percentage and stop there. That leaves you with a number you cannot check. The method below walks through one complete attic example so you can see every input, every formula, and where the result can drift. Use it as a template, then substitute your own measurements and bills.
A Worked Example for a 1,200-Square-Foot Attic
Assume a 1,200-square-foot attic floor, existing loose-fill insulation at about R-11, a target of R-49, and a hypothetical quoted cost for blown-in insulation and air sealing.
Now estimate savings. Pull twelve months of utility bills and separate the heating and cooling portion from the rest.
Apply the expected reduction from moving to your target R-value. Ask your contractor for a range rather than a single figure, and use that range to estimate annual savings.
Call (702) 707-4242 for a free estimate →
Simple payback = net cost ÷ annual savings. Test a range of savings shares and net costs before deciding, since the result depends heavily on these inputs.
The Formulas in One Place
- Attic-related spend = annual heating and cooling spend × attic share (use 0.15 to 0.25 as a planning range)
- Estimated annual savings = attic-related spend × expected reduction (ask your contractor for a range)
- Net cost = total installed cost − eligible incentives
- Simple payback (years) = net cost ÷ estimated annual savings
- Net savings over N years = (annual savings × N) − net cost
Running Low, Typical, and High Cases
A single number implies precision the inputs do not support. Run three cases instead. Using the same $2,100 cost and $280 attic-related spend:
If even the high case produces a payback longer than the expected service life of the insulation, the upgrade is hard to justify on energy savings alone. If the typical case lands inside a reasonable horizon, the project deserves a professional assessment. The point of the range is to show which assumption your decision actually hinges on.
Watch out: Do not plug a contractor's savings percentage directly into the formula. Ask what baseline R-value and climate assumptions produced it, because assumptions from a different climate may not fit a hot one.
Checking the Result Against Your Own Bills
Before you trust the estimate, compare it with reality. Pull the same summer month from two prior years and note the cooling portion. If your estimate implies a drop you have never seen in your own bills, the savings share is probably too high. A second check is to divide estimated annual savings by the attic area: a result far above what neighbors report for similar homes usually means an input is off.
The article walks through the savings math with a set of formulas and a low, typical, and high case, which a reader can scan side by side.
| Formula item | What it means | Where it comes from |
|---|---|---|
| Attic-related spend | Annual heating and cooling spend × attic share | Your utility bills; planning range 0.15 to 0.25 |
| Estimated annual savings | Attic-related spend × expected reduction | Ask your contractor for a range |
| Net cost | Total installed cost − eligible incentives | Your written quotes and verified incentives |
| Simple payback (years) | Net cost ÷ estimated annual savings | Result of the formulas above |
| Net savings over N years | (Annual savings × N) − net cost | Your chosen time horizon |
Adjusting the Math for Climate, Energy Prices and Incentives
The base calculation assumes stable prices and a fixed savings rate. Neither holds. This section shows how to adjust each input so the payback you report is defensible, and it treats incentives as a line item rather than an afterthought.
Climate and Equipment Efficiency
Savings depend on the gap between indoor and outdoor conditions and on how hard your equipment works to close it. A home with a heat pump or a high-efficiency furnace converts each unit of energy into more delivered heating or cooling, so the dollar savings from reduced load can differ from a home with older equipment. Ask your contractor to state the assumed equipment efficiency behind any savings estimate. If your system is being replaced in the same project, model the combined upgrade separately from insulation alone, because the two interact.
Energy Prices and Rate Changes
Utility rates move. A payback calculated at today's rate will be wrong if rates rise or fall. Rather than guess, run the payback at your current rate and at a rate 10% higher and 10% lower. If the decision flips between those cases, the project is sensitive to rate risk and you should weight the conservative case. Keep in mind that savings are a dollar figure, so a rate increase raises savings and shortens payback, while a decrease stretches it.
Finding and Subtracting Incentives
Incentives change the net cost, and net cost is the numerator in every payback formula. Treat this as a required step, not a bonus.
- Check whether a federal tax credit applies to qualifying insulation and air-sealing work, and confirm the current amount and eligibility rules with the official IRS guidance before you rely on it (Energy Efficient Home Improvement Credit).
- Check state and local programs, which often publish eligible measures and caps.
- Check your utility's rebate catalog, since many utilities list insulation and air-sealing rebates by measure and R-value.
- Ask your contractor which incentives they will document for you, and get the paperwork in writing.
Then recompute: Net cost = total installed cost − verified incentives. Subtracting verified incentives lowers net cost and shortens payback, sometimes materially.
Watch out: Do not subtract an incentive you have not confirmed is available for your home, your utility, and the specific measure installed. An unverified rebate produces an optimistic payback that will not survive the first utility bill.
Sensitivity: Which Input Moves the Answer Most
Not all inputs matter equally. In most attic projects, the expected reduction percentage and the attic share of heating and cooling spend drive the result far more than the cost per square foot. Test them one at a time: hold everything else fixed, change the reduction from 20% to 30%, and note how much payback moves. Then do the same for the attic share. The input that swings payback the most is the one to verify with your contractor before you commit. This step is what separates a planning estimate from a number you can defend.
Common Mistakes That Distort Your Insulation ROI
Most bad estimates come from a few predictable errors.
- Ignoring air leaks. Gaps around fixtures and penetrations can undo much of the benefit. Seal them first.
- Overlooking duct losses. Leaky ducts in an attic waste conditioned air. Fixing them can matter as much as the insulation itself.
- Using only one year of bills. Weather varies. Averaging several years gives a steadier baseline.
- Forgetting ventilation. Blocking attic vents can cause moisture problems. Confirm your plan keeps ventilation intact.
- Skipping incentive checks. Many homeowners never look for rebates, so they overstate their payback.
Requesting a Free Estimate to Verify Your Numbers
Once you've run your own numbers, a professional assessment can help confirm them. Ask a technician to measure your existing insulation, check for air leaks, and test your ductwork, then provide a written quote you can compare against your calculation.
Call (702) 707-4242 for a free estimate from RTS Comfort Cooling & Heating. Bring your utility bills and your measurements so the visit goes faster.
Frequently Asked Questions
What is the ROI on attic insulation?
Attic insulation ROI is the net savings over the life of the upgrade divided by the upgrade cost, expressed as a percentage. To estimate it, subtract your current annual heating and cooling costs from the projected costs after upgrading, multiply by the expected years of service, and compare the result to the installed price. Results vary widely with climate, home size, existing insulation depth and local energy prices, so treat any single figure as an estimate and verify it with a current quote from RTS Comfort Cooling & Heating.
How much will adding attic insulation save?
Savings depend on how far the R-value increases, how much heating and cooling your home uses, and what you pay per kilowatt-hour or therm. Homes with very little existing insulation typically see the largest percentage reduction in heating and cooling use, while homes that already meet current recommended levels see smaller gains. Use your own utility bills as the baseline, and ask RTS Comfort Cooling & Heating for a home-specific estimate rather than relying on general averages.
How do you calculate the payback period for attic insulation?
Simple payback equals the net upgrade cost divided by the annual energy savings. If an upgrade costs $3,000 after any rebates and saves $300 per year, the simple payback is 10 years. This method ignores inflation, rising energy prices and the insulation's remaining life, so a discounted or lifetime-savings view gives a fuller picture. Pricing depends on attic size, insulation type and access, so request a written quote from RTS Comfort Cooling & Heating before finalizing your inputs.
Is it better to remove old attic insulation before adding new?
Removal makes sense when the existing insulation is wet, contaminated, heavily compressed or affected by pests, because those conditions reduce performance and can create air quality problems. If it is dry and reasonably intact, adding new material over it is often the lower-cost path. Removal adds labor and disposal expense to the upgrade cost, which lengthens the payback period, so include it in your calculation. A technician can inspect the attic and recommend which approach fits your home.