 how-to
How to Fix Missing C-Wire for Smart Thermostat
Table of Contents
- What Is a C-Wire and Why Your Smart Thermostat Needs One
- How to Identify Thermostat Wires and Check for a C-Wire
- C-Wire Adapter Installation: Your First Solution
- Smart Thermostat Compatibility Check Before You Buy
- Running New Thermostat Wire from Your HVAC System
- Battery-Powered Smart Thermostats as an Alternative
- Troubleshooting Thermostat Power Issues and Common Mistakes
- When to Call a Professional for Smart Thermostat Installation
Last Updated: August 13, 2026
What Is a C-Wire and Why Your Smart Thermostat Needs One
A C-wire (common wire) is the fifth wire in your HVAC system that provides continuous 24-volt power to your smart thermostat. Most smart thermostats require this constant power supply to maintain Wi-Fi connectivity, display illumination, and backup battery charging. Without it, your thermostat may lose connection or drain batteries rapidly.
Smart thermostats need steady voltage to run processors, maintain network connections, and store data. The C-wire completes the electrical circuit by providing a return path for 24V power from your HVAC system's transformer. If your home was built before smart thermostats became standard, your thermostat wiring likely has only four wires: R (red, power), W (white, heat), G (green, fan), and Y (yellow, cooling). Adding a C-wire or finding an alternative solution is essential before installing most modern smart thermostats. Several practical solutions exist beyond running entirely new wiring.
How to Identify Thermostat Wires and Check for a C-Wire
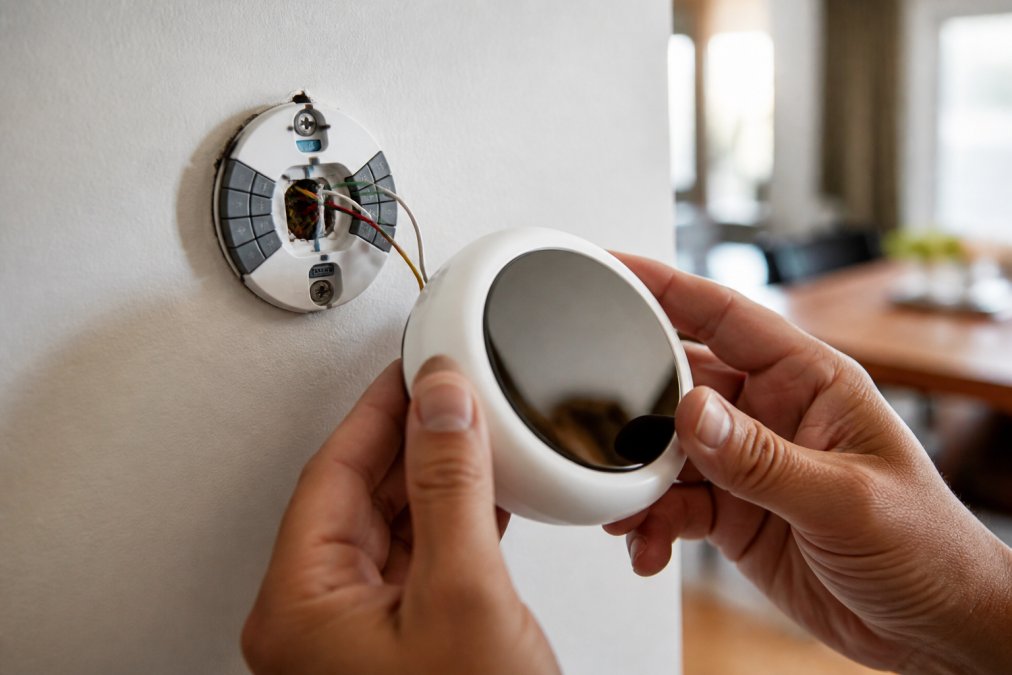
Turn off power at your breaker before opening your thermostat faceplate. Gently remove the cover to expose the terminal block on the backplate.
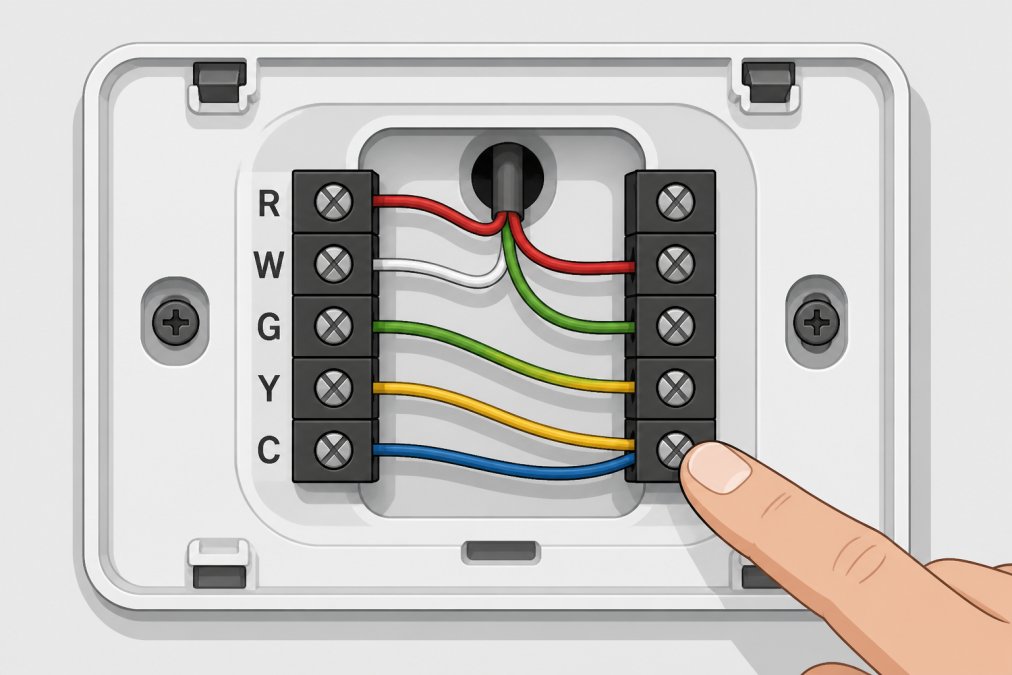
Examine the backplate for these standard wire colors and terminals:
- R (red): 24V power from the transformer
- W (white): Heat call signal to furnace
- G (green): Fan operation signal
- Y (yellow): Air conditioning call signal
- C (common): 24V return path to complete the circuit
A C-wire may exist but simply wasn't connected to the thermostat terminal during original installation. Look carefully at the backplate; if there's a blue, black, or spare wire present but unconnected, that may be your C-wire waiting to be activated. If you see only four wires connected and no fifth wire in the sheath, you'll need to either run new wire, install a power extender kit, or switch to a battery-powered alternative.
Use a multimeter set to voltage mode to confirm the R-wire carries approximately 24 volts when your HVAC system is powered.
C-Wire Adapter Installation: Your First Solution
If you've confirmed no C-wire exists in your wall cavity, a power extender kit (also called a C-wire adapter) is the fastest solution. These devices tap into existing wires to create a synthetic C-wire return path without requiring new conduit installation through your walls.
How Power Extender Kits Work
A power extender kit works by using the G-wire (fan signal) as a temporary return path during idle periods when the fan isn't running. The adapter monitors the thermostat's power draw and intelligently switches the G-wire function to maintain the 24V circuit. When your system calls for cooling or heating, the adapter releases the G-wire so it can operate the fan normally. This approach works reliably for most smart thermostats and avoids the expense and disruption of running new low-voltage wiring through walls.
Step-by-Step Adapter Installation
Step 1: Gather your materials and tools. You'll need the power extender kit itself, a multimeter, wire strippers, electrical tape, and potentially small wire nuts. Read your specific kit's instructions thoroughly.
Step 2: Turn off power at your breaker. Switch off the circuit controlling your HVAC system. Wait several minutes for any residual charge to dissipate. Confirm power is off using your multimeter on the R-wire.
Step 3: Disconnect your thermostat wires. Carefully remove each wire from its terminal on the thermostat backplate. Label each wire with tape marked with its terminal letter (R, W, G, Y) so you don't mix them during reconnection.
Step 4: Run wires from the furnace to the adapter location. Most power extender kits mount on or near your furnace control board. Route your thermostat wire bundle from the thermostat down to this location.
Step 5: Connect the adapter according to kit instructions. Strip approximately half an inch of insulation from each wire. Connect R, W, G, and Y to their corresponding terminals on the adapter. The adapter's output connects to your thermostat's C terminal.
Step 6: Reconnect your thermostat wires. Route the wires back up to your thermostat and reconnect them: R, W, G, Y, and the adapter's output to C. Ensure each connection is tight and secure.
Step 7: Restore power and test. Turn the breaker back on. Your thermostat should power up and recognize the C-wire connection. Test heating and cooling cycles to confirm all functions operate normally.
Smart Thermostat Compatibility Check Before You Buy
Not every smart thermostat handles a missing C-wire the same way. Some models work with power extender kits, while others require a dedicated C-wire. Before purchasing your smart thermostat, verify compatibility with your specific HVAC system and wiring situation.
Check the thermostat's technical specifications for C-wire requirements. Your HVAC system type also matters, heat pump systems have different wiring requirements than traditional furnace-plus-air-conditioner setups. Call your HVAC equipment manufacturer if you're unsure. Provide your furnace or air handler model number and ask whether a C-wire is required for smart thermostat compatibility.
Running New Thermostat Wire from Your HVAC System
If your home lacks a C-wire and you prefer a permanent solution over an adapter, running new low-voltage wiring is the definitive fix. This approach requires more effort and expense but eliminates dependency on power extender kits and ensures maximum compatibility with any future smart thermostat.
Safety Precautions Before Starting
Low-voltage thermostat wiring operates at 24 volts, which is far safer than household electrical current but still requires respect. Before opening your HVAC equipment, switch off the breaker controlling your furnace and air handler. Many furnaces have a separate disconnect switch near the unit; flip that as well. Wait five minutes for capacitors to discharge.
Never assume a breaker is off. Use a multimeter to confirm zero voltage on the R-wire and transformer terminals before touching any wiring. Never run thermostat wire in the same conduit as household electrical wiring (120V or 240V). Keep them separated by at least several inches to avoid electromagnetic interference.
Call (702) 707-4242 for a free estimate →
Locating Your 24V Transformer and Control Board
Your furnace or air handler contains a 24V transformer that powers your entire thermostat system. Open your furnace's access panel and locate the control board, a circuit board with multiple terminals and wiring connections. The transformer usually sits adjacent to this board. It has two primary terminals marked "24V" or "C" (common) for the return path and "R" or "24V+" for the power output.
Trace the existing thermostat wires backward from your attic or wall cavity to their origin at the transformer. This is where your new C-wire will originate.
Running Low Voltage Wiring to Your Thermostat
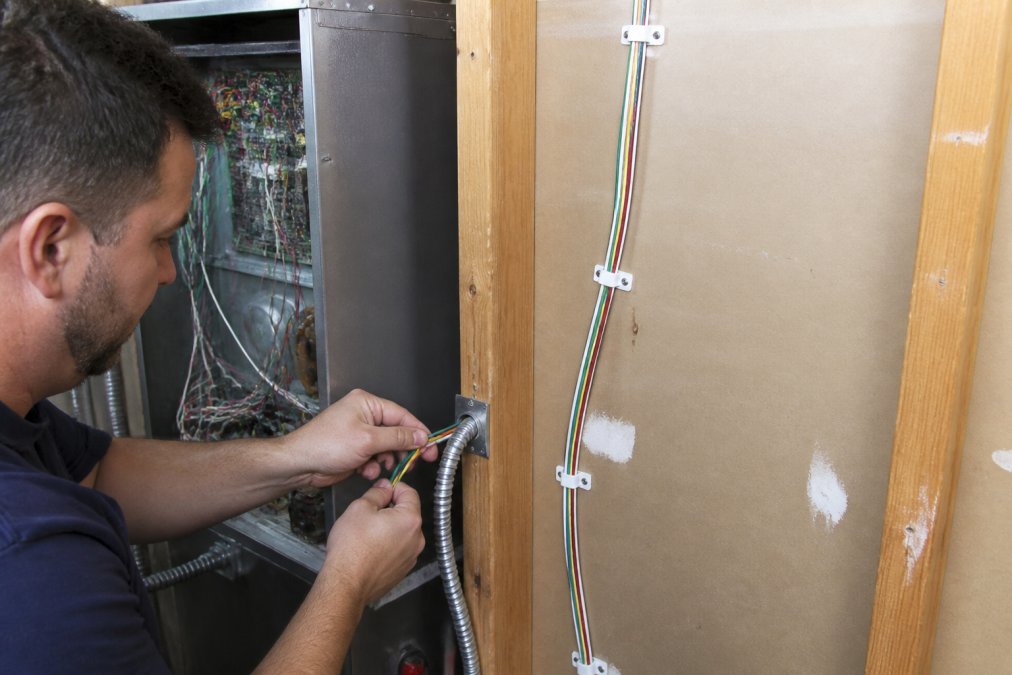
Measure the distance from your furnace to your thermostat location. Most thermostat wire is sold in 18-gauge or 16-gauge five-conductor bundles. Route the wire through your home's existing pathways whenever possible. Use wire staples every 12-18 inches to secure the wire along its path, but never staple so tightly that you crush the insulation.
At the furnace end, strip approximately half an inch of insulation from the new C-wire. Connect it to the common terminal on your transformer. Most transformers use small terminal blocks that accept stripped wire inserted into a slot and held by a set screw. Tighten the set screw firmly but not so hard that you strip the wire.
At the thermostat end, strip the same length of insulation and insert the new wire into the C terminal on your thermostat backplate. Ensure it's seated fully and the terminal screw is tight.
Test your work before closing any panels. Restore power at the breaker and use your multimeter to confirm 24V between the R and C terminals at your thermostat. Run a heating cycle and a cooling cycle to confirm all functions operate normally.
Battery-Powered Smart Thermostats as an Alternative
Some smart thermostats operate entirely on battery power and don't require a C-wire at all. These models draw minimal current and use AA or AAA batteries that last 6-12 months before replacement. They're an excellent option if you want to avoid the complexity of adapter kits or new wiring.
Battery-powered thermostats sacrifice some convenience for simplicity. You won't have automatic remote access to every feature; some functions require manual thermostat interaction or work only when your Wi-Fi is connected. However, for homeowners who primarily want basic scheduling and occasional remote temperature adjustments, battery operation is entirely adequate. Check battery status regularly, as most models display a low-battery warning weeks before they fully drain.
Troubleshooting Thermostat Power Issues and Common Mistakes
If your smart thermostat powers on initially but loses connection or shuts down intermittently, power supply problems are usually the culprit. Start by confirming your C-wire connection is tight. Loose terminal screws are the most common cause of intermittent power loss.
Remove your thermostat faceplate and gently tug each wire at the backplate. If any wire moves or pulls free, tighten the terminal screw firmly and test again. If tightening connections doesn't solve the problem, measure voltage across your R and C terminals using a multimeter. You should see approximately 24 volts. If voltage is significantly lower (below 18V), your transformer may be failing or overloaded.
A common mistake is connecting the new C-wire to the wrong transformer terminal. The common terminal is usually marked "C" or "COM" in white text on the transformer. Another frequent error is running the new C-wire in the same conduit as household electrical wiring, which creates electromagnetic interference that disrupts thermostat communication.
When to Call a Professional for Smart Thermostat Installation
DIY thermostat installation works well for straightforward situations: a power extender kit on a single-stage furnace with accessible wiring runs, or activation of an existing but disconnected C-wire. However, several scenarios warrant professional installation.
If your furnace control board is damaged, corroded, or illegible, identifying the correct transformer terminals becomes risky. A professional HVAC technician can navigate damaged equipment safely. Similarly, if your HVAC system is a heat pump with auxiliary heating stages, multi-zone systems, or older equipment with non-standard wiring, the complexity increases significantly. Running new thermostat wire through finished walls, attic spaces with limited access, or conduit systems requires experience and the right tools.
At RTS Comfort Cooling & Heating, we handle smart thermostat installation as part of our comprehensive HVAC services. Our team can evaluate your specific system, identify the best C-wire solution for your situation, and complete the installation with confidence. If you're uncertain whether your situation is DIY-friendly, a consultation with a professional is worthwhile.
Smart thermostats add genuine convenience and energy savings to your home, but they require reliable power to deliver those benefits. Whether you choose a power extender kit, run new thermostat wire, or switch to a battery-powered model, addressing your missing C-wire before installation prevents frustration and system failures. If you're in the Las Vegas area and want professional guidance on the best solution for your HVAC setup, RTS Comfort Cooling & Heating is ready to help. Call (702) 707-4242 for a free estimate and expert installation that ensures your smart thermostat works flawlessly from day one.
| Solution | Installation Time | Best For | Reliability |
|---|---|---|---|
| Power extender kit | 1-2 hours | Existing wiring, budget-conscious homeowners | High for most systems |
| New thermostat wire | 3-6 hours | Permanent solution, future-proofing | Highest |
| Battery-powered thermostat | 30 minutes | Minimal wiring, low-maintenance preference | Medium (battery dependent) |
| Professional installation | Varies | Complex systems, heat pumps, peace of mind | Highest |
Frequently Asked Questions
Can you use a smart thermostat without a C-wire?
Yes, but with limitations. Many smart thermostats draw power from the R-wire (red), but this often causes battery drain or intermittent operation. A C-wire adapter, battery backup, or a battery-powered smart thermostat solves this. If your HVAC system lacks a C-wire entirely, you'll need one of these three solutions to keep your smart thermostat running reliably.
How do I know if I have a C-wire in my thermostat?
Turn off power to your HVAC system, remove your thermostat faceplate, and look at the terminal block. A C-wire is a common wire (usually blue or black) connected to the 'C' terminal. If you see an empty 'C' terminal with no wire, or no 'C' terminal at all, you don't have one. Use a multimeter to test continuity between the thermostat 'C' terminal and your furnace control board to confirm.
Is it safe to use a C-wire adapter or power extender kit?
Yes, when installed correctly. Power extender kits are UL-listed devices designed to create an artificial C-wire by borrowing power from existing wires without overloading them. They're safer than jury-rigging connections. However, they work best in systems with a heat pump or humidifier already installed. Always follow the manufacturer's wiring diagram and turn off power before installation.
What's the difference between running new wire and using an adapter?
Running new low voltage wiring from your 24V transformer to your thermostat is permanent and reliable but requires access to your HVAC equipment and walls. It's the most robust solution. A C-wire adapter is faster and non-invasive but depends on your existing wiring configuration and may have power limitations. Choose based on your comfort level, system type, and whether you plan to keep the thermostat long-term.
This article was written using GrandRanker