 how-to
How to Fix Inconsistent Room Temperatures
Table of Contents
- Understanding Why Room Temperatures Vary
- Step 1: Check and Adjust Your Air Dampers
- Step 2: How to Balance HVAC Airflow Throughout Your Home
- Step 3: Seal Windows, Doors, and Air Leaks
- Step 4: Inspect and Replace Air Filters
- Step 5: Upgrade to a Smart Thermostat and Install Room Sensors
- Signs of Poor Attic Insulation and How to Address Them
- When to Call an HVAC Professional
- Frequently Asked Questions
Last Updated: August 31, 2026
Understanding Why Room Temperatures Vary
Inconsistent room temperatures are one of the most common complaints homeowners bring to HVAC professionals. Some rooms stay comfortably cool while others feel like a sauna. The core issue is airflow distribution. Your HVAC system produces conditioned air, but getting that air to reach every room equally is surprisingly complex. Ductwork that runs through unconditioned spaces, dampers that were never balanced, leaks in the thermal envelope, and undersized or oversized equipment all contribute to hot and cold spots throughout your home.
Most inconsistent room temperatures stem from problems you can address yourself or with professional help. Before assuming your system is failing, work through a systematic diagnosis. Start with the simplest fixes, damper adjustment and filter replacement, then move to more involved solutions like sealing air leaks and upgrading to a smart thermostat with room sensors.
Step 1: Check and Adjust Your Air Dampers
Your HVAC ductwork likely contains dampers, small lever mechanisms inside the ducts that control airflow to different zones or rooms. Dampers sit inside the supply ducts, usually accessible from the basement, crawlspace, or attic. They look like small handles or levers sticking out from the ductwork. When fully open, the lever is parallel to the duct. When closed, it's perpendicular.
Over time, dampers get stuck, misaligned, or left in the wrong position. A previous owner or contractor may have closed a damper to a room you now want to condition. Dust and debris accumulate around the mechanism, making it stiff or immovable.
How to locate and adjust dampers:
- Turn off your HVAC system before working with dampers
- Access your ductwork in the basement, crawlspace, or attic
- Look for lever handles on the ducts and follow branches to see which damper controls which area
- Gently move each lever to the fully open position (parallel to the duct)
- If a damper is stuck, do not force it; corrosion or debris may have seized it
- Turn the system back on and wait 30 minutes, then check which rooms feel warmer or cooler
- If one room is still too warm, slightly close its damper by rotating the lever a quarter turn; if it's too cold, open it further
This is often a one-time fix. Many homes have dampers that were never properly balanced after installation.
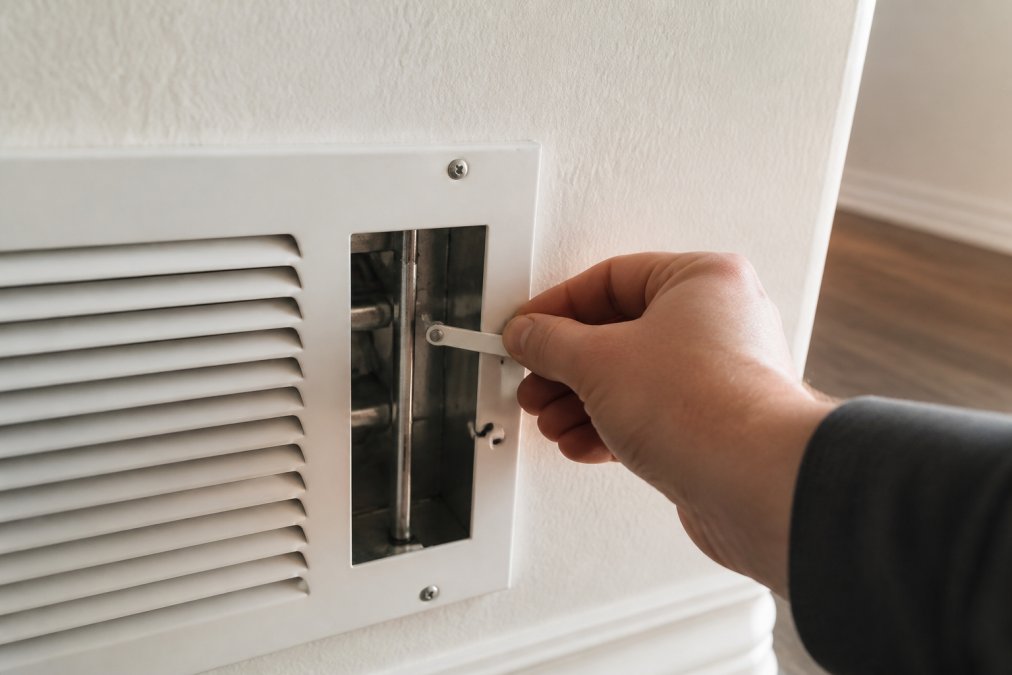
Step 2: How to Balance HVAC Airflow Throughout Your Home
Balancing airflow means ensuring every room receives the correct amount of conditioned air relative to its size and heat load. Start by identifying which rooms feel too hot or too cold, then measure the temperature in each room at the same time of day using a simple thermometer. A difference of 3-5 degrees between rooms is normal; anything more suggests an airflow imbalance.
Supply registers, the vents where air enters each room, can be partially closed to reduce airflow, and return vents should be unobstructed. Many homeowners accidentally block returns by placing furniture in front of them, which starves the system of air and forces it to work harder.
Steps to balance airflow:
- Walk through your home and check all return vents; move any furniture or objects blocking them
- Locate all supply registers and note which rooms have them
- Feel the air coming from each register; it should be strong and consistent
- If a register feels weak, check if it's partially closed and open it fully
- Close interior doors to rooms you want to condition less, forcing more air to other areas
- If certain rooms consistently run hot, close their supply registers halfway; if they run cold, open them fully
- Wait 24 hours and re-measure temperatures to see if the balance has improved
Many homes have uneven ductwork layouts where some branches are longer or more convoluted than others, delivering less air due to friction.
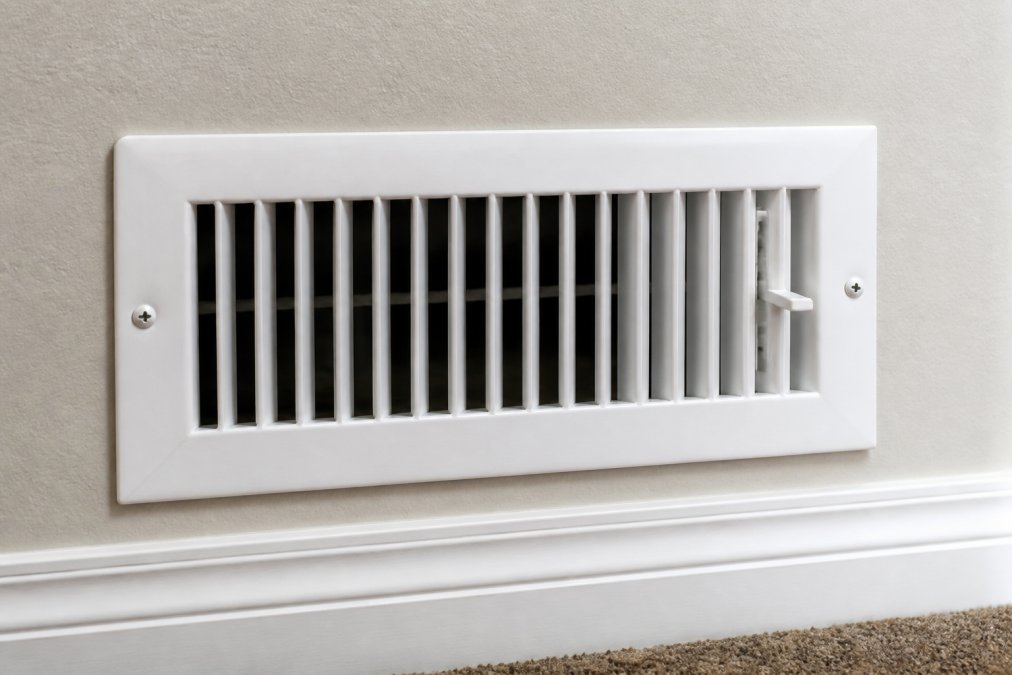
Step 3: Seal Windows, Doors, and Air Leaks
Air leaks in your thermal envelope allow conditioned air to escape and outdoor air to infiltrate. This directly causes inconsistent room temperatures because some rooms lose more air than others depending on their location and exposure. Rooms on the north side of the house, or rooms with older windows, tend to lose more conditioned air in winter.
Check for visible gaps around window frames and door frames. Feel for drafts on windy days by holding a candle or incense near potential leak points; the flame will flicker if air is moving. Common leak locations include gaps between window frames and walls, cracks around door frames, gaps where pipes or wires enter the home, cracks in the foundation, and gaps around attic access panels.
Sealing approach:
- Caulk gaps around window and door frames using paintable caulk
- Apply weatherstripping around door frames
- Seal gaps around pipes and wires using expanding foam; trim excess with a utility knife
- For basement cracks, use concrete caulk or hydraulic cement depending on whether water is present
Sealing air leaks typically improves inconsistent room temperatures by 2-4 degrees because you're reducing the amount of conditioned air escaping.
Step 4: Inspect and Replace Air Filters
A clogged air filter restricts airflow throughout your entire system, which worsens inconsistent room temperatures. When the filter is dirty, the air handler struggles to pull air through the return ducts, reducing the volume of conditioned air reaching your home.
Check your air filter every month. If it looks gray or brown instead of white, it's time to replace it. Most standard filters need replacement every 1-3 months depending on how much dust your home accumulates.
Replacing your air filter:
- Locate your air handler, usually in the basement, attic, or utility closet
- Note the filter size printed on the frame (common sizes are 16x25x1, 20x25x1, 16x25x4)
- Purchase replacement filters of the same size
- Turn off your HVAC system
- Remove the old filter by sliding it out of the slot
- Insert the new filter with the arrow pointing toward the air handler
- Turn the system back on
A clean filter improves airflow and can resolve inconsistent room temperatures if the filter was severely clogged.
Step 5: Upgrade to a Smart Thermostat and Install Room Sensors
Smart thermostats with room sensors represent a major leap in addressing inconsistent room temperatures. Traditional thermostats measure temperature at a single location and cycle the system on and off based on that one reading. If that sensor is in a cool room, it keeps running to reach the set point, overheating other areas.
Smart thermostats with wireless room sensors measure temperature in multiple rooms simultaneously. The system then adjusts dampers or cycles on and off to maintain your target temperature across all monitored rooms.
How smart thermostats with sensors work:
- The thermostat communicates wirelessly with sensors placed in 2-4 key rooms
- The system calculates an average temperature across all sensors
- It adjusts HVAC operation to reach that average, rather than targeting one room
- Some models allow you to set different target temperatures for different sensors
Most homeowners report that smart thermostats with room sensors reduce temperature swings by 3-5 degrees within days of installation.
RTS Comfort Cooling & Heating offers professional smart thermostat installation, ensuring proper wiring and sensor placement for optimal performance. Call (702) 707-4242 for a free estimate.
Call (702) 707-4242 for a free estimate →
Signs of Poor Attic Insulation and How to Address Them
Poor attic insulation is a hidden cause of inconsistent room temperatures, especially in multi-story homes. Heat rises naturally, so in winter, warm air escapes through an under-insulated attic. In summer, heat from the attic radiates down through the ceiling into upper rooms. Upper floors become too warm in winter and far too hot in summer, while lower floors remain relatively stable.
Signs of poor attic insulation include upper rooms consistently 5+ degrees warmer than lower rooms, ice dams forming on the roof edge in winter, visible gaps or settled areas in existing insulation, insulation that's compacted or wet, and uninsulated pipes or ducts in the attic.
Attic insulation is measured in R-value, which indicates its thermal resistance. Most areas benefit from R-38 to R-60 in the attic. If your attic has less than R-30, upgrading will noticeably improve temperature consistency. Professional installation ensures proper coverage, air sealing, and ventilation, all critical to preventing moisture issues and maximizing effectiveness.
When to Call an HVAC Professional
Some inconsistent room temperature problems require professional intervention. If you've adjusted dampers, balanced airflow, sealed obvious leaks, replaced your air filter, and temperatures still vary by more than 5 degrees, the issue likely involves your ductwork, HVAC system sizing, or a more complex problem.
Call an HVAC professional if:
- Your home has extreme temperature differences (10+ degrees between rooms)
- You suspect your HVAC system is undersized or oversized for your home
- You have a multi-story home with significant thermal stratification that DIY fixes don't resolve
- Your ductwork is inaccessible or you suspect leaks inside walls
- You want to install a professional zoning system with motorized dampers
- Your air handler or ductwork shows signs of damage, corrosion, or poor installation
RTS Comfort Cooling & Heating provides comprehensive HVAC diagnosis and repair. Our technicians can identify whether your inconsistent room temperatures stem from ductwork problems, system sizing issues, or installation defects. We offer 24/7 emergency service and professional smart thermostat installation with room sensors. Call (702) 707-4242 for a free estimate.
Inconsistent room temperatures don't mean your HVAC system is failing. In most cases, they signal an airflow distribution problem you can diagnose and fix systematically. Start with damper adjustment and air filter replacement, these are free or nearly free and resolve many cases. Progress to sealing air leaks and upgrading your thermostat if needed. For complex issues involving ductwork or system sizing, RTS Comfort Cooling & Heating provides expert diagnosis and professional solutions. Contact us at (702) 707-4242 to schedule a free evaluation.
| Problem | Cause | Solution | Expected Improvement |
|---|---|---|---|
| Some rooms 3-5°F warmer than others | Dampers misaligned or closed | Adjust dampers to balanced position | 2-4°F reduction in variance |
| Upper floors consistently too warm | Poor attic insulation | Add insulation to R-38+ | 3-5°F reduction; eliminates ice dams |
| Weak airflow in specific rooms | Supply register partially closed | Open register fully | Immediate improvement in that room |
| Temperature swings throughout day | Single-point thermostat reading | Upgrade to smart thermostat with sensors | 3-5°F reduction in swings |
| Air leaks around windows and doors | Gaps in thermal envelope | Caulk and weatherstrip | 2-3°F improvement in affected rooms |
| Clogged air filter reducing airflow | Dust accumulation in filter | Replace air filter | Immediate airflow improvement |
Frequently Asked Questions
How much does it cost to fix inconsistent room temperatures?
Cost depends on the root cause. Damper adjustment and filter replacement are free or under $50. Caulking and weatherstripping cost $100-300. Smart thermostat installation ranges higher. For professional ductwork diagnosis or attic insulation, contact RTS Comfort Cooling & Heating for a free estimate at (702) 707-4242.
Can I fix inconsistent room temperatures without calling a professional?
Many cases resolve with damper adjustment, filter replacement, and sealing obvious air leaks. However, if your home has extreme temperature differences or suspected ductwork problems, professional diagnosis is worth the investment.
How long does it take to balance HVAC airflow?
Initial balancing takes 1-2 hours. However, the system needs 24-48 hours to stabilize before you can accurately assess whether the fix worked.
Will a smart thermostat really fix inconsistent room temperatures?
Smart thermostats with room sensors significantly reduce temperature variance by monitoring multiple rooms instead of one. Most homeowners see 3-5°F improvement in consistency.
Should I install a professional zoning system or just use a smart thermostat?
Smart thermostats with sensors are a good first step and cost far less than a professional zoning system. Zoning systems use motorized dampers and are best for homes with extreme temperature differences. RTS Comfort Cooling & Heating can assess whether your home would benefit from zoning during a free consultation.
According to the U.S. Department of Energy's guidance on home insulation, proper attic insulation and air sealing can reduce heating and cooling energy use significantly by minimizing heat loss and gain through the building envelope. The American Society of Heating, Refrigerating and Air-Conditioning Engineers (ASHRAE) standards recommend specific R-values and ductwork sealing practices for optimal HVAC performance and thermal comfort. Research from the National Association of Home Builders on HVAC system design emphasizes the importance of proper ductwork layout and damper balancing in preventing hot and cold spots throughout residential homes.
Frequently Asked Questions
Why is one room in my house always hotter than the others?
Hot and cold spots occur when airflow distribution is uneven across your HVAC ductwork, or when some rooms have poor insulation and higher heat gain. Upper floors naturally trap more heat due to stack effect, where warm air rises. Closed dampers, blocked vents, or an undersized HVAC system can also create temperature imbalances. Start by checking supply registers and dampers in the affected room, then inspect insulation levels and air leaks around windows and doors.
How do the benefits of smart thermostat installation help with inconsistent room temperatures?
Smart thermostats paired with remote room sensors monitor ambient temperature in multiple zones simultaneously, allowing your HVAC system to adjust blower fan cycles and airflow based on actual conditions in each room. This prevents your air handler from cycling off too early in some areas while others remain uncomfortable. Smart thermostats also learn your patterns and can balance thermal comfort more precisely than manual thermostats, reducing energy waste while improving consistency.
Can poor attic insulation really cause uneven room temperatures?
Yes. Poor attic insulation allows significant heat loss in winter and heat gain in summer, especially affecting upper-story rooms. When insulation is inadequate or has settled over time, your thermal envelope weakens, forcing your HVAC system to work harder to maintain consistent climate control. This is why signs of poor attic insulation, such as ice dams, hot upper floors, or cold spots near exterior walls, often correlate with inconsistent room temperatures throughout your home.
Should I try to fix temperature imbalances myself, or call an HVAC professional?
Simple fixes like adjusting dampers, sealing air leaks, and replacing filters are safe DIY tasks. However, if inconsistent room temperatures persist after these steps, or if you suspect ductwork issues, HVAC system sizing problems, or zoning system retrofitting needs, contact a professional. An HVAC technician can perform a Manual J load calculation to verify your system is properly sized and diagnose deeper issues with your air handler or ventilation design that DIY adjustments cannot resolve.
This article was written using GrandRanker