 how-to
How to Fix Thermostat C-Wire Issues: Step-by-Step
Table of Contents
- What Is a C-Wire and Why Your Thermostat Needs It
- How to Test Thermostat Voltage at the Control Board
- Identifying C-Wire Problems at Your Thermostat Base
- C-Wire Adapter Installation for Smart Thermostat Power
- Troubleshooting Smart Thermostat Power Issues Without C-Wire
- Checking Your Furnace Control Board and Transformer
- Common Mistakes to Avoid When Fixing C-Wire Issues
- When to Call a Professional HVAC Technician
Last Updated: August 27, 2026
What Is a C-Wire and Why Your Thermostat Needs It
A C-wire (common wire) is the fifth wire in your HVAC system's low voltage wiring that provides a continuous 24-volt power supply to your thermostat. Without it, smart thermostats struggle to maintain power, leading to frequent resets, error codes, and loss of functionality.
Most older homes were built with only four wires: R (red, power), Y (yellow, cooling), G (green, fan), and W (white, heating). The C-wire completes a full circuit back to the furnace control board, ensuring stable power delivery. Modern smart thermostats like Nest and Ecobee draw significantly more power than mechanical thermostats and require this dedicated return path (peer-reviewed research).
Without a C-wire, your thermostat may display "No Power" errors, lose Wi-Fi connectivity, or drain its battery constantly. The good news is that fixing C-wire issues doesn't always require running new wiring through your walls.
How to Test Thermostat Voltage at the Control Board
Testing voltage at your furnace control board is the fastest way to confirm whether a C-wire is present and whether power is reaching your thermostat correctly.
What You'll Need Before Testing
Gather a digital multimeter ($15-50), a flashlight, a notepad, and your furnace manual or a photo of the terminal block layout. Look for a multimeter with a voltage setting that includes DC (direct current) in the 24V range.
Step-by-Step Voltage Testing Process
Step 1: Turn off power to your furnace
Locate the circuit breaker controlling your furnace and switch it to OFF. Wait 30 seconds, then flip it back ON. This power cycle clears temporary faults on the control board.
Step 2: Set your multimeter to DC voltage mode
Turn the dial to the 24V DC setting. The furnace transformer steps down household voltage to 24 volts for thermostat control.
Step 3: Locate the terminal block at your furnace
Open your furnace cabinet and look for a small block of terminals labeled R, Y, G, W, and C. Take a photo for reference.
Step 4: Test between R and C terminals
Place your multimeter's red probe on the R terminal and the black probe on the C terminal. A healthy reading should show approximately 24 volts (ashrae.org). If you see zero volts or below 20 volts, your transformer is failing or the circuit is broken.
Step 5: Test between R and each remaining terminal
Check R to Y, R to G, and R to W. Each should read around 24 volts when the system is in standby. Significantly lower readings suggest a break in that wire's continuity.
Step 6: Check for voltage at the thermostat base
If your furnace shows 24V at the control board but your thermostat shows no power, the problem is in the wiring run between furnace and thermostat, indicating a broken wire, loose connection, or damaged insulation.
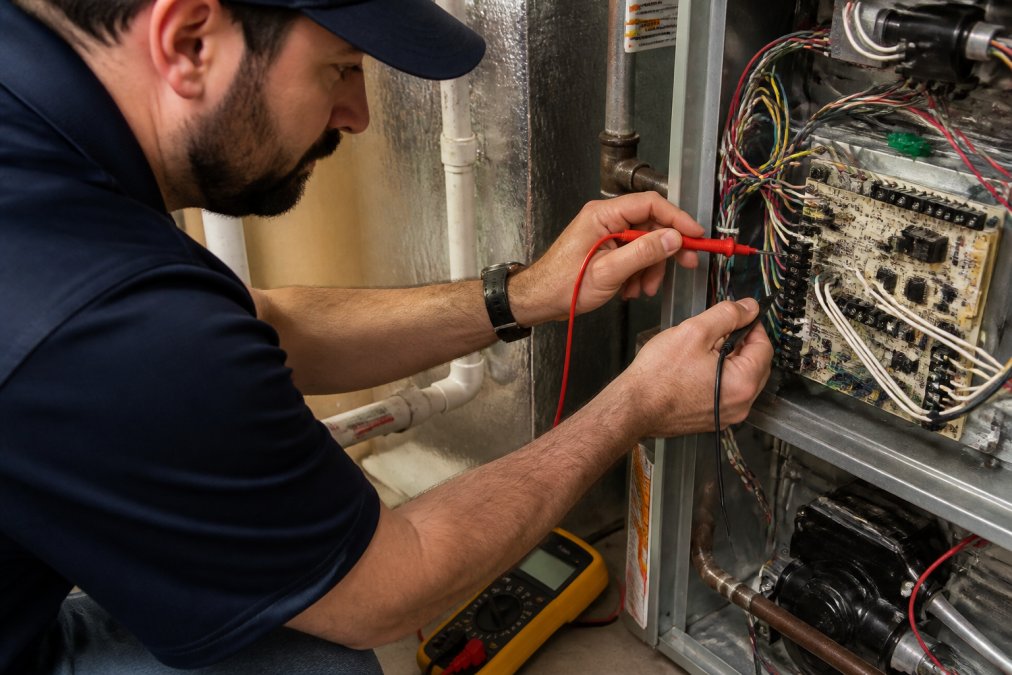
A reading below 20 volts often means your 24V transformer is undersized for your HVAC system's electrical load, which is common when adding a second AC unit or high-demand smart thermostat to an older furnace.
Identifying C-Wire Problems at Your Thermostat Base
Many C-wire issues start at the thermostat itself. Loose connections, damaged insulation, or wires never connected in the first place are the most common culprits.
Visual Inspection Checklist
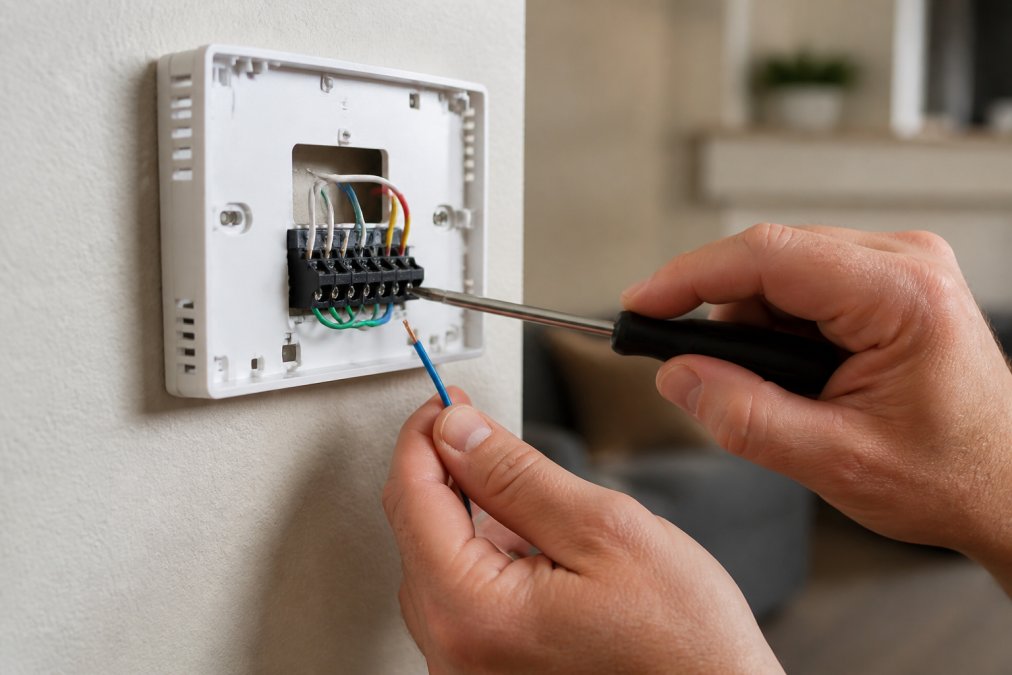
- Remove your thermostat faceplate and look at the terminal block on the base
- Check whether a wire is actually connected to the C terminal
- Look for any loose, frayed, or discolored wires
- Verify that wire labels match the furnace terminal labels
- Check for any bent or corroded terminal screws
- Look for any visible wire damage, pinching, or crushing along the wall run
- Confirm the thermostat base is firmly mounted
Many homes have a fifth wire bundled with the original four but left unconnected at both ends. If you see a fifth wire (often blue or black) coiled behind your old thermostat, connect that existing wire to the C terminal at both the thermostat and furnace.
Common Wiring Errors That Cause Power Loss
Reversed polarity is surprisingly common. If someone connected C to R and R to C, your thermostat receives reverse voltage and won't power on. Check your connections against your furnace manual's wiring diagram.
Loose terminal screws account for nearly 30% of power issues. Vibration from the furnace gradually loosens connections over months. Tighten every screw on your thermostat base with a small flathead screwdriver using firm pressure.
Pinched or crushed wires happen when thermostats are mounted too tightly or drywall screws puncture the wire bundle. If you see discoloration or exposed copper, that wire is likely broken internally and needs replacement.
Daisy-chaining multiple devices on a single transformer is a common mistake. If your furnace also powers a humidifier, air cleaner, or UV light, those devices share the same 24V supply. Adding a power-hungry smart thermostat can overload the transformer, causing voltage to drop below the thermostat's minimum operating threshold.
C-Wire Adapter Installation for Smart Thermostat Power
If you've confirmed no C-wire exists and running new wiring isn't practical, a power extender kit (PEK) is your solution. This device creates an artificial C-wire by using existing wiring to generate the power your thermostat needs.
When and Why You Need a Power Extender Kit
A power extender kit bridges the gap between older furnaces with no C-wire and modern smart thermostats that demand continuous power. It works by monitoring the G (fan) wire and creating a small voltage pulse that simulates a C-wire connection.
You need a PEK if your furnace has no fifth wire running to the thermostat, running new wiring would require cutting through walls, your smart thermostat keeps losing power despite proper wiring, or your transformer voltage drops below 20V when the thermostat is powered.
A PEK costs roughly $50-150 depending on the brand and furnace type. However, PEKs have limitations: they don't work with all furnace types (some heat pumps and dual-transformer systems reject them), and they occasionally cause a faint buzzing noise from the furnace relay.
Installation Steps for a PEK
Step 1: Turn off power to your furnace and thermostat
Switch the breaker to OFF and wait 30 seconds.
Step 2: Disconnect your thermostat
Remove all wires from your old thermostat base. Take a photo of the connection layout before disconnecting. Label each wire with tape if colors are faded.
Step 3: Mount the PEK near your furnace
Call (702) 707-4242 for a free estimate →
Most power extender kits mount directly to the furnace cabinet or on the wall nearby. Keep the PEK away from heat sources and moisture.
Step 4: Connect the furnace wires to the PEK
The PEK has terminal blocks labeled to match your furnace wires. Connect R, Y, G, W, and the existing C wire (if present) to the corresponding PEK terminals. Tighten each screw firmly.
Step 5: Run new wires from the PEK to your thermostat
The PEK outputs new R, Y, G, W, and C wires. Run these to your thermostat, connecting each to its matching terminal.
Step 6: Restore power and test
Turn the breaker back on. Your thermostat should power up within 30 seconds. If it doesn't, check that all terminal screws are tight and that you haven't reversed any wire connections.
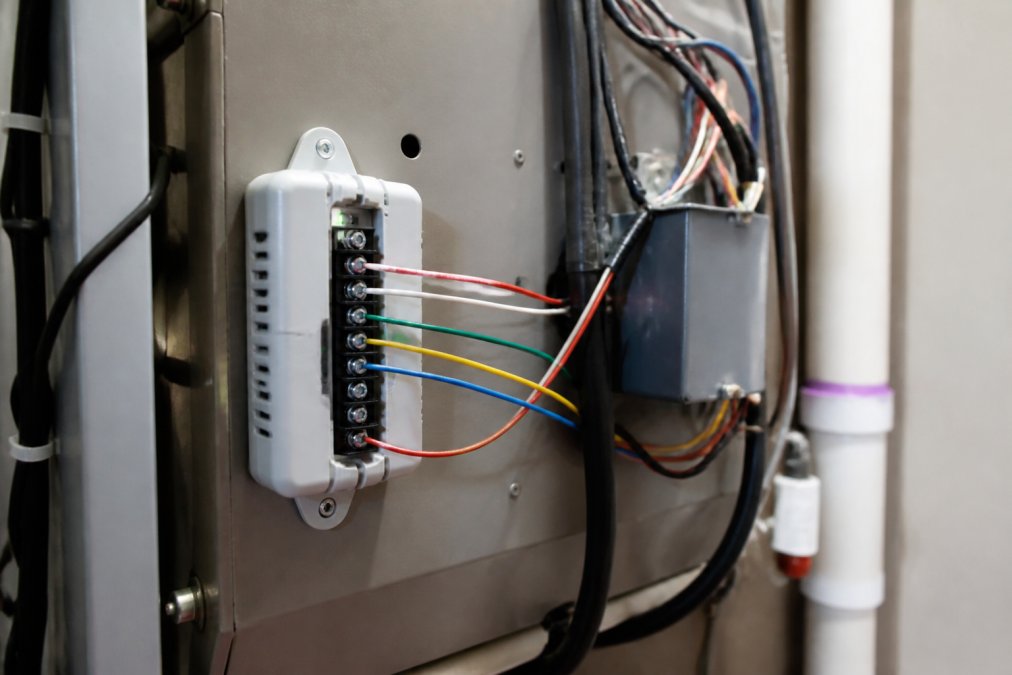
Most PEKs are compatible with standard single-stage furnaces and air conditioning systems. Dual-transformer setups sometimes reject PEKs because the device can't generate proper voltage across both transformers simultaneously.
Troubleshooting Smart Thermostat Power Issues Without C-Wire
Even with proper wiring, smart thermostats sometimes display power errors or lose connectivity. These issues often stem from voltage problems, loose connections, or system incompatibility rather than a missing C-wire.
Diagnosing No Power and Error Codes
"No Power" or "Low Battery" errors mean the device isn't receiving sufficient voltage to operate. Test voltage at the thermostat base using your multimeter. Place the red probe on R and the black probe on C. You should see at least 20 volts (ashrae.org). Anything below 18 volts will cause power warnings.
If voltage is low, check your transformer by testing at the control board. A transformer that reads 24V at the board but drops to 18V at the thermostat indicates a break or high-resistance connection in the wiring between the two points.
Testing Continuity and Checking for Loose Connections
Continuity testing tells you whether a wire is broken anywhere along its run. Set your multimeter to the continuity setting (usually marked with a sound-wave symbol). Disconnect one end of the wire you're testing, then place one probe on each end. If the meter beeps or shows very low resistance (under 5 ohms), the wire is intact. If it shows infinite resistance, the wire is broken.
Loose connections are harder to spot visually but easy to fix. Go through every terminal screw on your thermostat base, furnace control board, and any intermediate junction boxes. Tighten each one with a small screwdriver.
Checking Your Furnace Control Board and Transformer
Your furnace's control board and 24V transformer are the heart of your thermostat's power system. When they fail, no amount of wiring fixes will restore power.
The transformer is a small, heavy component that looks like a metal box with two coils wrapped around an iron core. It steps down 120V household current to 24V for thermostat control. A failing transformer produces a humming or buzzing sound, delivers voltage that's too low, or cuts out intermittently.
Test your transformer by measuring voltage across its secondary terminals (the low-voltage side where thermostat wires connect). You should see 24V AC when the furnace is powered on. If you see 0V or fluctuating readings below 20V, the transformer is failing. Replacement typically costs $150-300 in parts and labor.
The control board is a circuit board that manages the furnace's relays, safety switches, and thermostat signals. Modern boards have diagnostic LEDs that flash error codes when something is wrong. Check your furnace manual to decode what the LED pattern means.
Common Mistakes to Avoid When Fixing C-Wire Issues
The most frequent mistakes homeowners make are rushing the diagnosis, skipping safety steps, and assuming a missing C-wire when the real problem is elsewhere.
Not testing voltage before assuming a missing C-wire. Many people see "No Power" and immediately assume they need a C-wire. Always test first; diagnose second.
Connecting wires without turning off the furnace. Working on live circuits risks electrical shock and can damage your thermostat or furnace electronics. Always switch off the breaker before touching any wires.
Using the wrong gauge wire for new C-wire runs. If you do run a new C-wire, use the same gauge (thickness) as your existing thermostat wires.
Ignoring the buzzing or humming sound from the furnace relay. This noise often signals that your thermostat is stealing power from the G (fan) wire. It's a warning sign that your system is electrically unstable.
Installing a power extender kit on an incompatible furnace. Dual-transformer systems, heat pumps, and some high-efficiency furnaces don't work well with standard PEKs. Always verify compatibility before purchasing.
Not securing wires properly after installation. Use wire staples or clips every 12 inches along the wire run, but don't crush the wires.
When to Call a Professional HVAC Technician
Some thermostat C-wire issues require professional diagnosis and repair. Knowing when to stop troubleshooting and call in an expert saves time and prevents costly mistakes.
Call a professional if your multimeter readings don't match what you expected, your furnace is under warranty, you suspect your transformer or control board is failing, you need to run new wiring through walls or attic, your thermostat still shows no power after checking all connections, you have a heat pump or dual-fuel system, or your furnace is more than 20 years old.
At RTS Comfort Cooling & Heating, we handle smart thermostat installations and C-wire troubleshooting regularly. Our technicians can diagnose power issues in minutes, install power extender kits correctly, and run new wiring if needed. The cost of a professional diagnostic call depends on the specific service and your system's needs. Contact us for a free estimate.
Thermostat C-wire issues frustrate homeowners because the symptoms (no power, constant resets, lost Wi-Fi) feel urgent but the cause isn't always obvious. Start with voltage testing and visual inspection, these steps cost nothing and solve the majority of cases. If testing reveals a missing C-wire and running new wiring isn't practical, a power extender kit provides a reliable workaround for most furnace types. When you're ready to install a smart thermostat or troubleshoot persistent power issues, contact RTS Comfort Cooling & Heating at (702) 707-4242 for a free estimate. Our team handles complex wiring scenarios, verifies system compatibility, and ensures your thermostat receives stable 24V power for years of reliable operation.
Frequently Asked Questions
Q: Will a smart thermostat work without a C-wire?
A: Most modern smart thermostats require continuous 24V power from a common wire to operate reliably. Without a C-wire, your thermostat may experience intermittent power loss, frequent reboots, or display errors. Some thermostats can operate on battery backup temporarily, but this drains batteries quickly and leaves your system vulnerable. A power extender kit (PEK) or C-wire adapter installation solves this problem by creating the missing 24V return path your thermostat needs.
Q: How can I test if my thermostat's C-wire is providing power?
A: Use a multimeter set to DC voltage mode. Turn off power at your circuit breaker, locate the C-wire terminal at your furnace control board, then restore power. Place the multimeter's red probe on the C-wire terminal and the black probe on a ground point. A reading of 20-24V indicates proper voltage. If you see 0V or inconsistent readings, your C-wire has a break, loose connection, or is missing entirely. Test continuity by setting your multimeter to ohms mode to check for wire damage.
Q: What should I do if my C-wire isn't getting power?
A: Start by checking for loose connections at both the thermostat base and the furnace control board terminals. Turn off power, reseat all wires firmly, and restore power to retest. If voltage is still absent, inspect the wire for visible damage, pinches, or corrosion. Check your circuit breaker to confirm it hasn't tripped. If the wire appears intact but still has no voltage, your 24V transformer may be faulty or overloaded. At this point, professional diagnosis is necessary to avoid creating safety hazards or damaging your HVAC system further.
Q: Is a C-wire adapter safe to install myself?
A: A power extender kit is generally safe for homeowners to install if you follow the manufacturer's instructions carefully and turn off power at your circuit breaker before working. However, if you're uncomfortable working with low-voltage wiring or electrical components, or if you're unsure about your system's compatibility, professional installation is worth the investment. Improper installation can damage your thermostat, furnace control board, or create intermittent power problems that are difficult to diagnose later.
This article was written using GrandRanker