 how-to
Fixing AC Wiring for Smart Thermostats: A Step-by-Step Guide
Table of Contents
- What You'll Need Before Starting
- Safety Precautions Before Working with AC Wiring
- Understanding HVAC Wiring Color Codes
- Identifying Common Thermostat Wiring Issues
- Testing Voltage at Thermostat Terminals with a Multimeter
- C-Wire Adapter Installation and Troubleshooting HVAC Thermostat Connection
- Fixing AC Wiring for Smart Thermostats: Step-by-Step
- Common Mistakes to Avoid
- Frequently Asked Questions
Last Updated: September 2, 2026
What You'll Need Before Starting
Gather a digital multimeter ($15-50) to test voltage safely, this is non-negotiable. You'll also need needle-nose pliers, a small flathead screwdriver, wire strippers rated for low-voltage work, and a flashlight for tight spaces. If you're missing a C-wire, you may need a power extender kit (PEK), a small device that generates the common wire signal without requiring new physical wiring.
Have your thermostat's wiring diagram handy before starting. If you don't have it, check the manufacturer's website or the documentation that came with your smart thermostat. Most installation guides include a compatibility checker. Take a photo of your existing thermostat wiring before disconnecting anything, this becomes your reference if you get confused. RTS Comfort Cooling & Heating recommends this step to prevent costly mistakes.
Safety Precautions Before Working with AC Wiring
Turn off power at the circuit breaker before beginning any wiring work. Most thermostats run on 24V AC power supplied by a transformer connected to your HVAC system (ashrae.org). Locate your HVAC system's circuit breaker, switch it to OFF, wait a full minute, then use your multimeter to verify that voltage reads zero at the thermostat terminals.
Never work on AC wiring while the system is powered up. Even 24V AC current can trigger involuntary muscle contractions. If you're uncomfortable working with electricity, call a professional. RTS Comfort Cooling & Heating offers 24/7 emergency service for exactly this reason.
Wear safety glasses when working near electrical connections. Never assume a wire is de-energized just because it looks old or disconnected. Always test with your multimeter first, this habit prevents the most common wiring accidents.
Understanding HVAC Wiring Color Codes
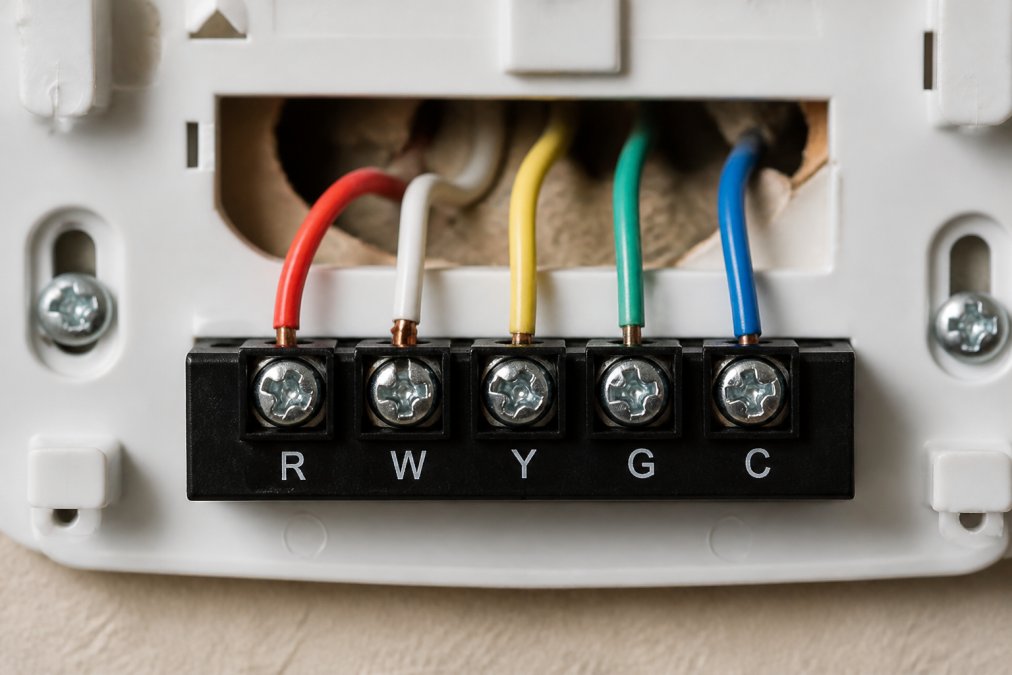
HVAC thermostat wiring follows a standard color convention. The R-wire (red) carries power from the transformer. The W-wire (white) controls heating. The Y-wire (yellow) controls air conditioning. The G-wire (green) controls the fan. The C-wire (blue or black) is the common wire that completes the electrical circuit and provides a return path for power. Modern smart thermostats almost always require a C-wire because they draw continuous power to maintain WiFi connectivity and display functions.
Some older systems use an O-wire (orange) for heat pump reversing valves, and the B-wire (brown) for specific heat pump configurations. Before connecting anything, verify that your wiring diagram shows which terminals on your furnace or air handler correspond to which functions.
Identifying Common Thermostat Wiring Issues
The most frequent problem is discovering you have no C-wire. Older thermostats drew minimal power and didn't need a continuous return path. Smart thermostats consume 200-500 milliamps continuously just to power their displays and WiFi radios, so a thermostat without a C-wire won't power on or shuts down unexpectedly (peer-reviewed research).
Reversed polarity, connecting the R-wire to the wrong terminal or the C-wire to a heating terminal, can cause erratic behavior: the thermostat powers on, loses connection, then powers back on in a cycle. Loose or corroded wire connections create intermittent failures. Corrosion on older copper wires reduces conductivity and causes voltage drop at the thermostat terminals. Broken wires inside the insulation also occur, especially where wiring runs through attics or crawl spaces. Your multimeter's continuity function detects this by checking whether current can flow through the entire wire length.
Testing Voltage at Thermostat Terminals with a Multimeter
Set your multimeter to AC voltage mode and select the 50V AC range (or 250V AC if unavailable). Turn off power at the circuit breaker before you begin, then turn it back on once you're ready to test.
Place the black probe on the C-wire terminal (or the W-wire terminal if you have no C-wire). Place the red probe on the R-wire terminal. The meter should read approximately 24V AC (nfpa.org). If it reads zero, power isn't reaching your thermostat. Check your circuit breaker first, it may have tripped. If the breaker is on but you're reading zero voltage, the transformer may be faulty or the wiring between the transformer and thermostat may be broken.
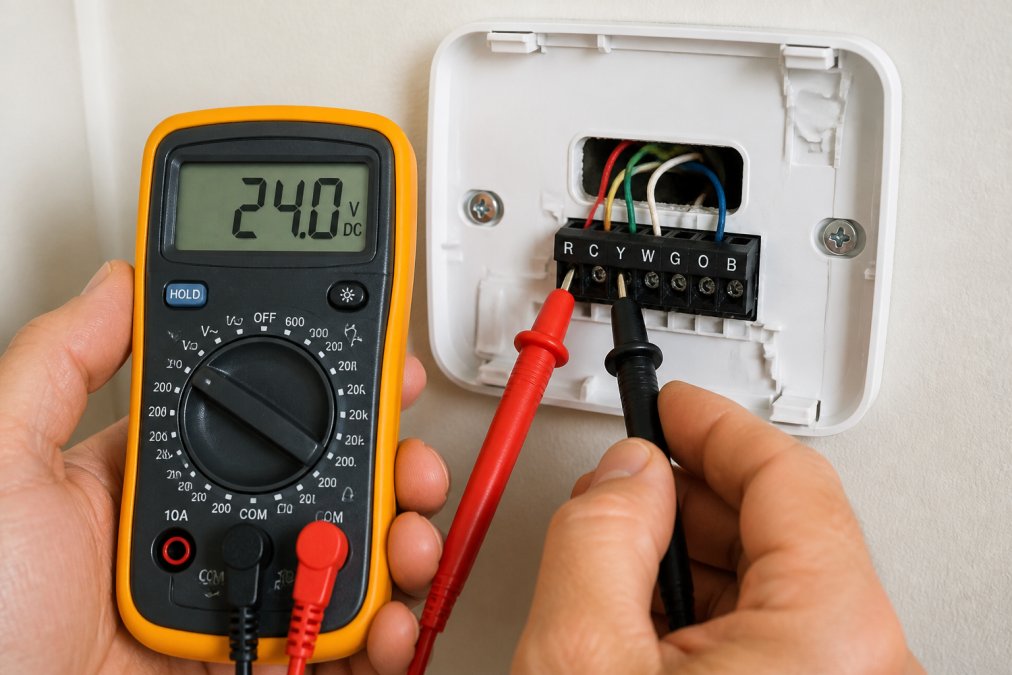
Next, test each individual wire against the C-wire by placing the black probe on C and touching the red probe to R, then W, then Y, then G. Each should read approximately 24V AC. If any wire reads zero, that circuit isn't functional. A reading significantly lower than 24V indicates voltage drop from a broken wire or poor connection.
Use the continuity function to test for broken wires. Disconnect the wire from its terminal, then place one probe at each end. The meter will beep or show resistance near zero if the wire is intact. High resistance or no beep means the wire is broken internally.
C-Wire Adapter Installation and Troubleshooting HVAC Thermostat Connection
If your system has no C-wire, a power extender kit solves the problem without running new wire through your walls. These adapters are installed at your furnace or air handler, not at the thermostat.
A power extender kit works by monitoring the W, Y, or G wire (whichever activates most frequently), and when that wire is de-energized, the kit generates a small voltage pulse back to the thermostat through the R-wire. This pulse is too small to trigger heating or cooling, but it maintains power to your smart thermostat's electronics.
Installation requires locating the transformer and control board in your furnace. The kit's wires connect to specific terminals on your control board. Before installing a kit, verify that your smart thermostat actually supports it, not all do. Check your thermostat's compatibility documentation or contact the manufacturer.
If you install a kit and your smart thermostat still won't power on, the problem may be insufficient voltage at the transformer. Test the transformer output with your multimeter. If it's reading below 20V AC, the transformer likely needs replacement. Troubleshooting after installation involves checking that all wires are seated firmly in their terminals. If the thermostat powers on intermittently, a loose connection is usually the cause.
Fixing AC Wiring for Smart Thermostats: Step-by-Step
Step 1: Turn Off Power and Document Existing Wiring (Time: 5 minutes)
Switch off the circuit breaker serving your HVAC system. Wait one minute. Take a clear photograph of your existing thermostat showing all wire connections and terminal labels. Write down the wire colors and which terminals they occupy.
Step 2: Remove the Old Thermostat (Time: 5 minutes)
Call (702) 707-4242 for a free estimate →
Gently pull the thermostat away from the wall. Loosen the terminal screws with your flathead screwdriver and disconnect each wire. Keep the wires separated so they don't touch each other.
Step 3: Inspect the Wiring (Time: 10 minutes)
Examine each wire for damage, corrosion, or breaks. Test continuity on each wire using your multimeter. If any wire fails the continuity test, note which one is broken.
Step 4: Prepare the New Thermostat (Time: 5 minutes)
Unpack your smart thermostat and review its wiring diagram. Verify that your existing wires match the thermostat's requirements. If you're missing a C-wire and the thermostat requires one, decide now whether you'll install a power extender kit or run new wire.
Step 5: Connect the Wires (Time: 10 minutes)
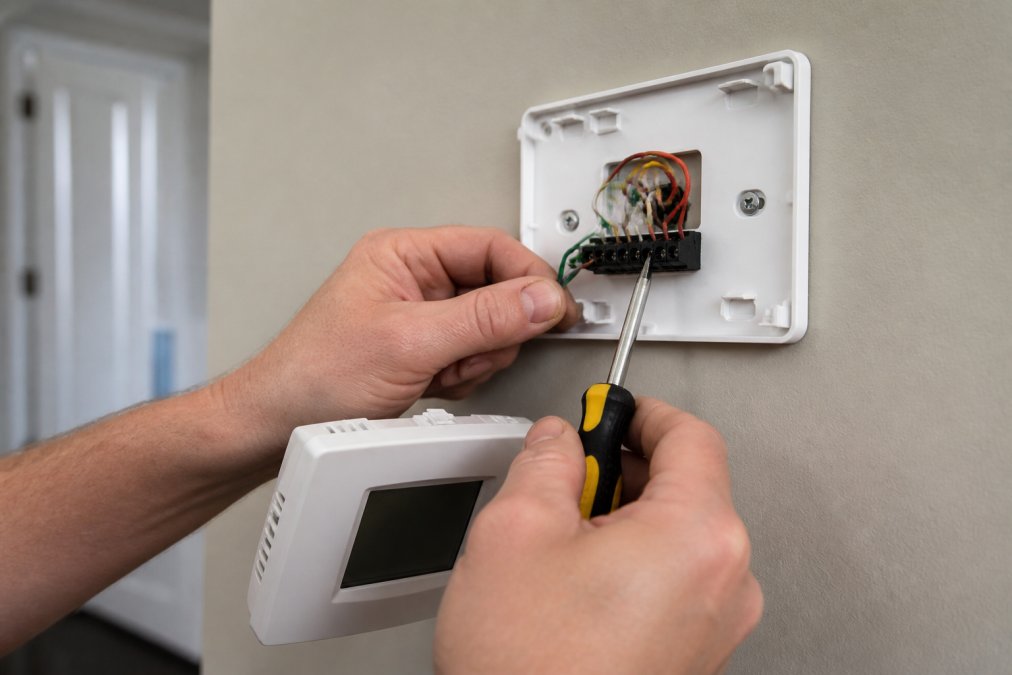
Insert each wire into its corresponding terminal on the new thermostat. Start with the R-wire (power), then W (heat), then Y (cool), then G (fan), then C (common) if present. Push each wire firmly into its terminal until it seats completely.
Step 6: Mount the Thermostat (Time: 5 minutes)
Attach the thermostat to your wall using the mounting plate and hardware provided. Ensure it's level and positioned away from direct sunlight, drafts, and heat sources.
Step 7: Restore Power and Test (Time: 10 minutes)
Turn the circuit breaker back on. The thermostat should power on within 30 seconds. Once powered on, test each HVAC function. Set the thermostat to heat and listen for your furnace to start. Set it to cool and listen for your air conditioner to start. Set it to fan-only and verify the blower runs.
| Step | Time Required | Key Check |
|---|---|---|
| Turn off power & document | 5 minutes | Breaker OFF, photo taken |
| Remove old thermostat | 5 minutes | All wires disconnected |
| Inspect wiring | 10 minutes | Continuity confirmed on all wires |
| Prepare new thermostat | 5 minutes | Compatibility verified |
| Connect wires | 10 minutes | All wires seated firmly |
| Mount thermostat | 5 minutes | Level and secure |
| Restore power & test | 10 minutes | All functions operational |
Common Mistakes to Avoid
The most frequent error is reversing the R and C wires. Always double-check your wiring diagram before connecting anything. Don't assume the wire colors in your home match the standard color code, some older installations use non-standard colors. This is why documenting your existing setup with a photograph is essential.
Another common mistake is leaving wires loose in their terminals. Push each wire in firmly until you feel resistance, then give it a gentle tug to confirm it won't pull free. Don't skip the voltage testing step, many homeowners assume their wiring is fine because the old thermostat worked, but an old thermostat drew minimal power and tolerated poor connections that a smart thermostat cannot.
Avoid running new thermostat wire alongside high-voltage electrical lines. Keep it at least 12 inches away from power lines, or use shielded cable rated for low-voltage applications. Don't install a power extender kit without confirming your smart thermostat supports it. Finally, never restore power while your hands are still touching the wiring.
If you've followed these steps and your smart thermostat still isn't functioning properly, professional installation ensures everything works correctly. RTS Comfort Cooling & Heating provides expert smart thermostat installation and AC wiring repair throughout the area, with 24/7 emergency availability. Call (702) 707-4242 for a free estimate and get your system running reliably today.
Frequently Asked Questions
Q: Do smart thermostats require a C-wire?
A: Most modern smart thermostats require a C-wire (common wire) to operate continuously. The C-wire provides a complete electrical circuit, delivering 24V power to keep the thermostat active. Without it, the device may lose power between heating or cooling cycles, causing connectivity issues or complete failure. If your HVAC system lacks a C-wire, you'll need to install one or use a power extender kit to make your smart thermostat function properly.
Q: Can I install a smart thermostat without a C-wire?
A: Some smart thermostats can operate without a C-wire using a power extender kit (PEK), which creates an alternative power path. However, this solution has limitations and may not work reliably with all HVAC systems, particularly heat pumps. If your system doesn't have an available C-wire, running one from your HVAC transformer is a dependable approach for stable smart thermostat operation.
Q: How do I identify which wires are which on my thermostat?
A: Thermostat wires follow standard HVAC color codes: R (red) for power, W (white) for heat, Y (yellow) for cooling, G (green) for fan, and C (black or blue) for common. Take a photo of your current wiring before disconnecting anything. If wires are unlabeled or faded, use a multimeter to test for voltage at each terminal. The R-wire typically shows 24V AC, while others show voltage only when that function is active. Matching wire colors to terminal labels is critical for proper system operation.
Q: What should I do if my AC doesn't turn on after installing a smart thermostat?
A: First, check that all wires are securely connected to the correct terminals according to your wiring diagram. Verify the circuit breaker serving your HVAC system hasn't tripped. Test voltage at the thermostat terminals with a multimeter to confirm power is reaching the device. If you recently installed a C-wire adapter, ensure it's properly connected to both the thermostat and transformer. If voltage is present but the system still won't run, the thermostat may need a power cycle or software reconfiguration. Contact an HVAC technician if these steps don't restore function.
This article was written using GrandRanker